OneLogin SAML Setup
OneLogin is one of many providers that act as a Identity provider. This guide shows you how to configure OneLogin to work with SAML v2 and Helpmonks to provide seamless single-sign-on.
Create an application
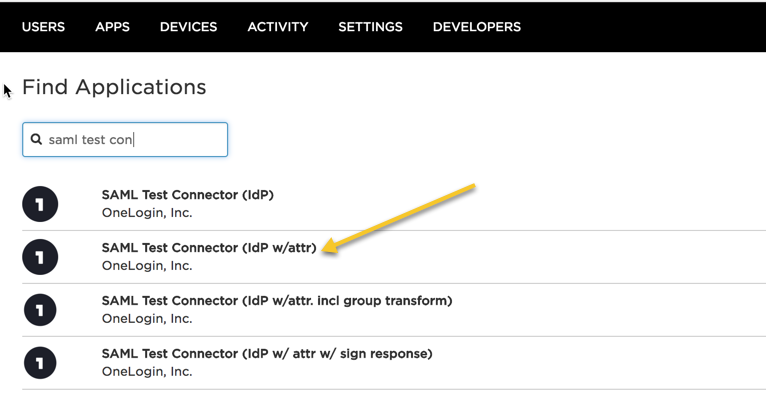
First we need to create an application to configure the authentication. Click on “Apps” and then on “Add Apps”.

In the search box, enter “SAML test con”. It should automatically filter the results. Select “SAML Test Connector (Idp w/attr)” from the list.
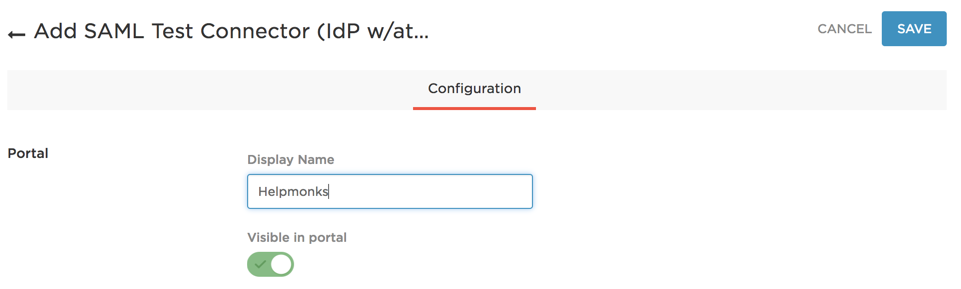
In the following step add the connectors name, e.g., “Helpmonks” and click on “Save”
Configure the application
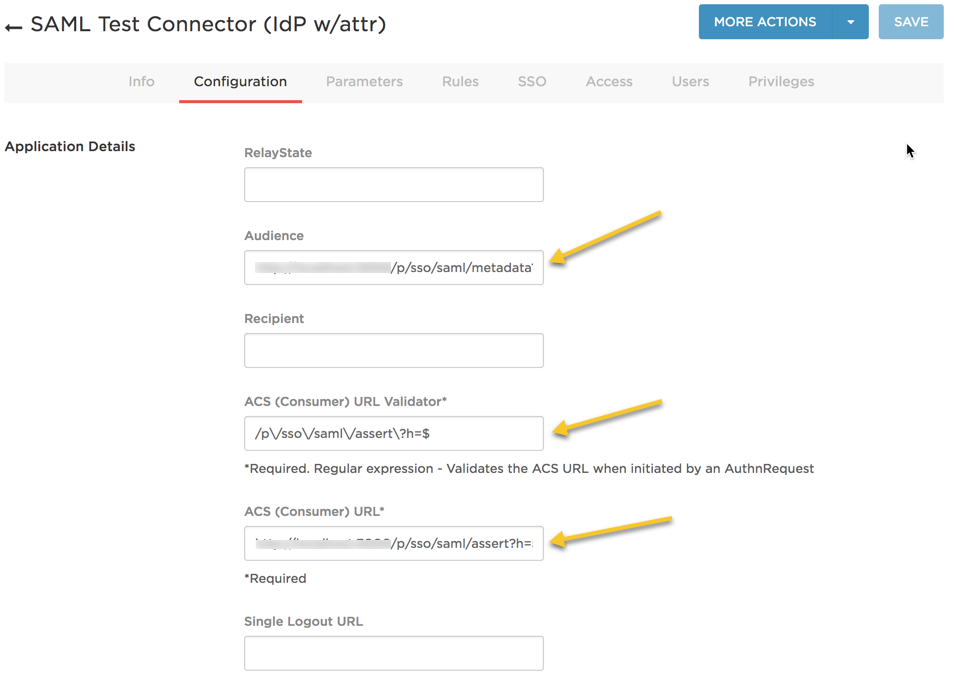
Click on the application you just created and select “Configuration”. Here copy and paste the “Entity ID” into the “Audience” fields, the “Assertion Consumer Service URL” into the “ACS (Consumer) URL” field, and “/p\/sso\/saml\/assert\?h=$” into the “ACS (Consumer) URL Validator” field.
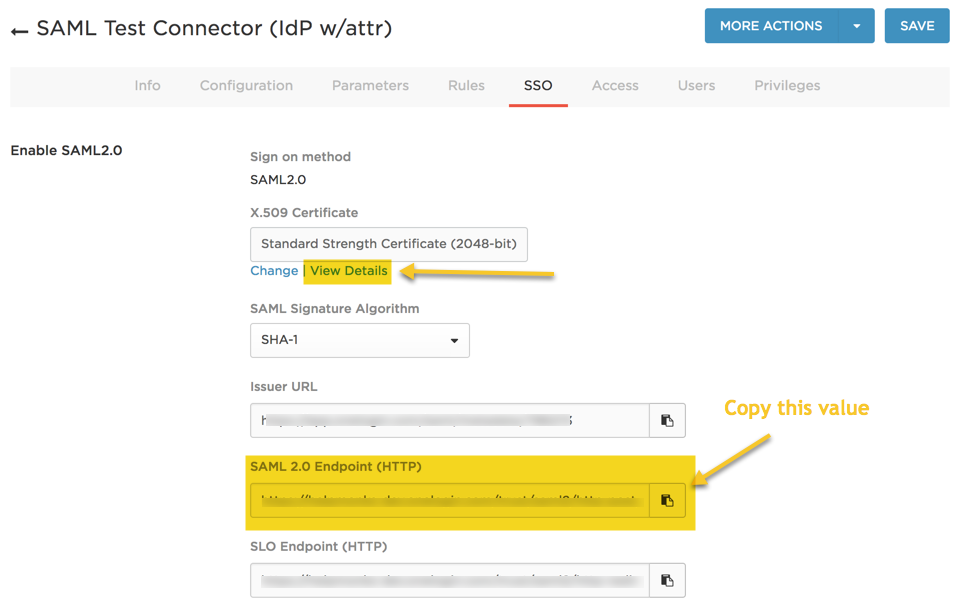
Next click on “SSO” and copy the value of “SAML 2.0 Endpoint (HTTP)” and download the OneLogin certificate (click on “View details” link). Then insert these two values into the Identity provider settings in the Helpmonks SAML plugin.
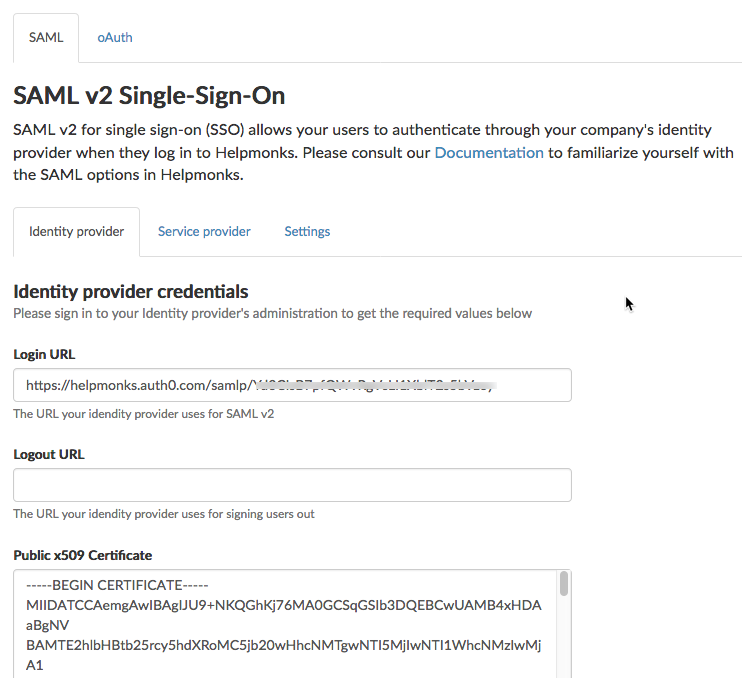
Copy values from here…
… and copy them into here:
Create a user
Once the application is configured, you can just add a user to OneLogin. Please make sure that the user has the same email address as a user in Helpmonks.
Remember, you need to create a user in Helpmonks first.
Finally test the SAML integration
If all is configured you can go back to Helpmonks and within the “SAML Settings” click on “Test login” to test the configuration.